Slack
将对话机器人连接到 Slack 需要将其配置为发送消息(使用 API 凭据)和接收消息(使用 webhook)。
发送消息
在你的 Rasa 项目的根文件夹中创建一个新文件 credentials.yml(如果使用过 rasa init,该文件应该已经存在,可以对其进行编辑)。将如下内容添加到文件中:
slack:
  slack_channel: "CA003L0XZ"    # channel ID, not a channel name!
  slack_token: "xoxb-XXX"       # token obtained in the next step
  slack_signing_secret: "YYY"   # secret obtained in the next step
除了侦听直接消息和应用提及的默认行为(例如 @app_name)之外,slack_channel 可以作为对话机器人通信侦听的一个频道或个人。要获取频道 ID,请右键单击 Slack 中的 channel 并选择 Copy Link。ID 是 URL 中的最后一部分。
在接下来的几个步骤中,你将创建一个 Slack 应用来获取 slack_token 和 slack_signing_secret 的值:
-
要创建应用,请转到 Your Apps并单击
Create New App。
创建应用 填写
App Name并选择Development Workspace,你将在其中构建你的应用。 -
前往
OAuth & Permissions并向下滚动到Scopes。Scopes将为应用提供在工作区中执行操作的权限。要开始,至少应该添加如下内容:
app_mentions:readchannels:historychat:writegroups:historyim:historympim:historyreactions:write
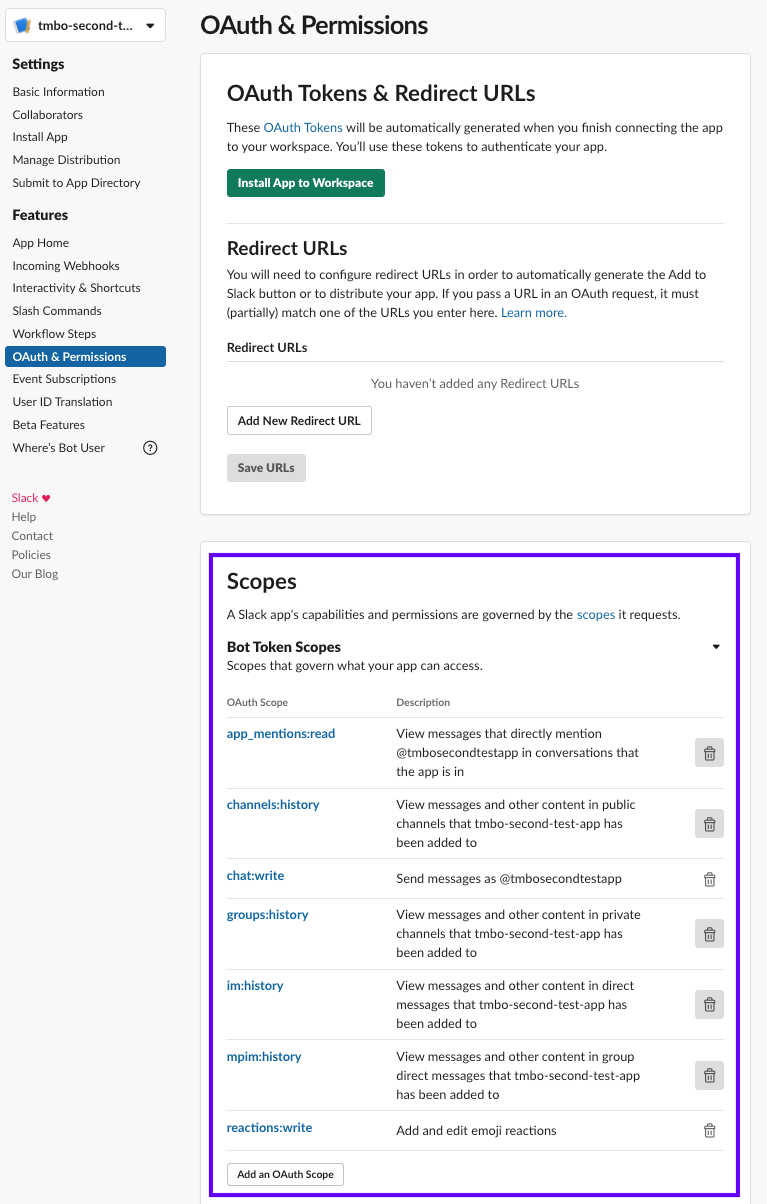
设置 Slack 权限 在 Slack API 文档中,你可以找到所有可用 scope 的列表和说明。
-
在
OAuth & Permissions页面上,单击Install App to Workspace来将机器人添加到你的工作区。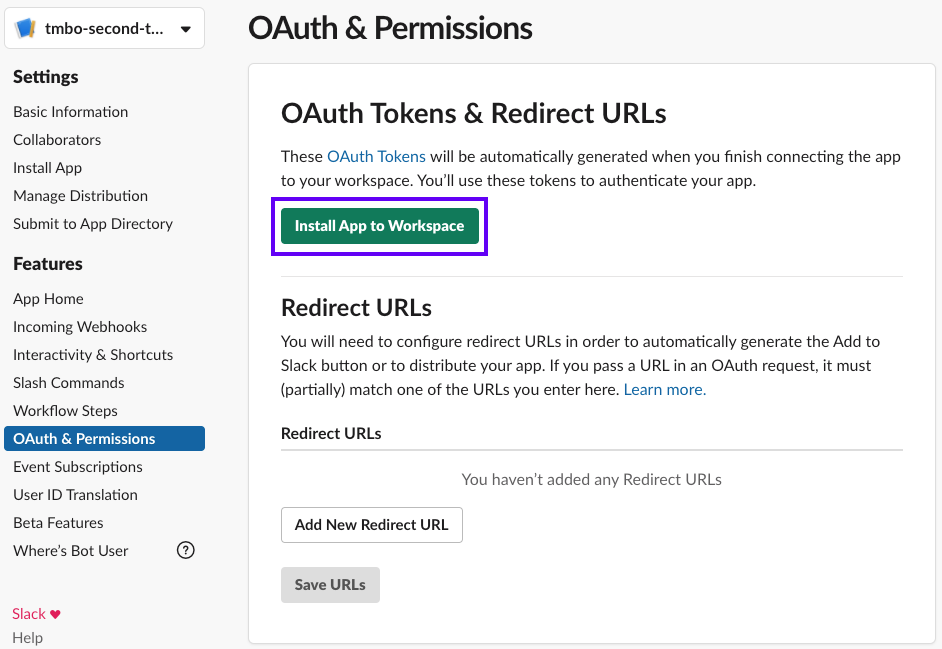
安装应用 添加后,Slack 将向你显示一个
Bot User OAuth Access Token,你需要将其添加到credentials.yml中作为slack_token的值:credentials.ymlslack: slack_channel: "your-channel" # choose a channel for your bot slack_token: "xoxb-XXX" # token obtained in the next step slack_signing_secret: "YYY" # secret obtained in the next step令牌应该以
xoxb开头。 -
前往
Basic Information来获取Signing Secret。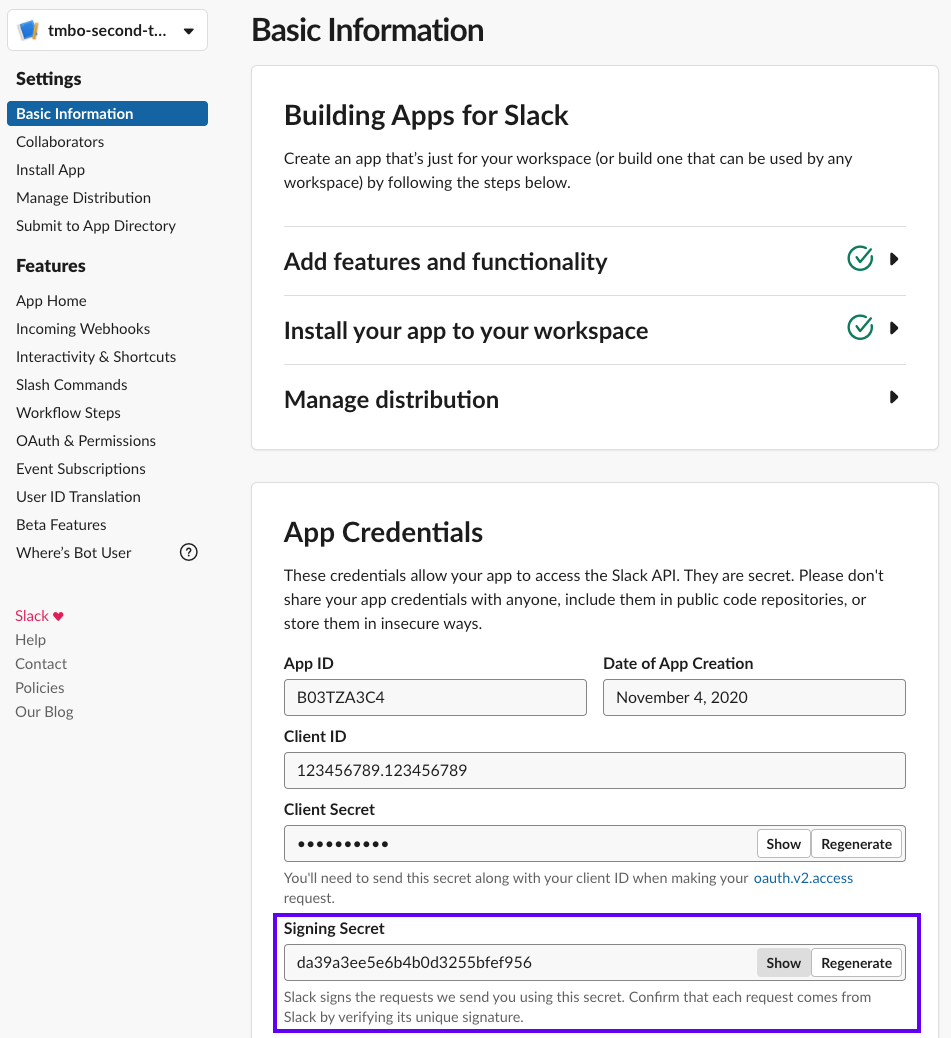
Signing Secret 将
signing secret复制到credentials.yml中作为slack_signing_secret的值:
此设置将允许你的机器人发送消息。现在让我们转到接受和响应消息的设置。
接受消息
在继续之前,请确保你已配置用于发送消息的 Slack 应用并将 Slack 凭据添加到 credentials.yml 文件中。
要接收消息,你需要一个公开的 URL,以便 Slack 访问你的对话机器人并告诉你最新的消息。如果在本地运行,可以使用 ngrok 测试频道。
-
要配置对话机器人接收消息,你的机器人需要首先运行。使用如下命令启动对话机器人:
如果在本地运行,请确保 ngrok(或其他公共 URL 工具)也处于运行状态。
-
要使用 Slack UI 直接向你的对话机器人发送消息,请前往
App Home,滚动到底部并选中Allow users to send Slash commands and messages from the messages tab。你可能必须退出 Slack 应用并重新打开它,然后更改才会生效。
-
前往
Event Subscriptions并打开Enable Events来配置 webhook。作为请求 URL,输入对话机器人的公开 URL 并添加
/webhooks/slack/webhook,例如:https://<host>/webhooks/slack/webhook,将<host>替换为你的 URL。如果你使用的是 ngrok,你的 URL 应该类似于https://92832de0.ngrok.io/webhooks/slack/webhook。你无法使用
localhost网址。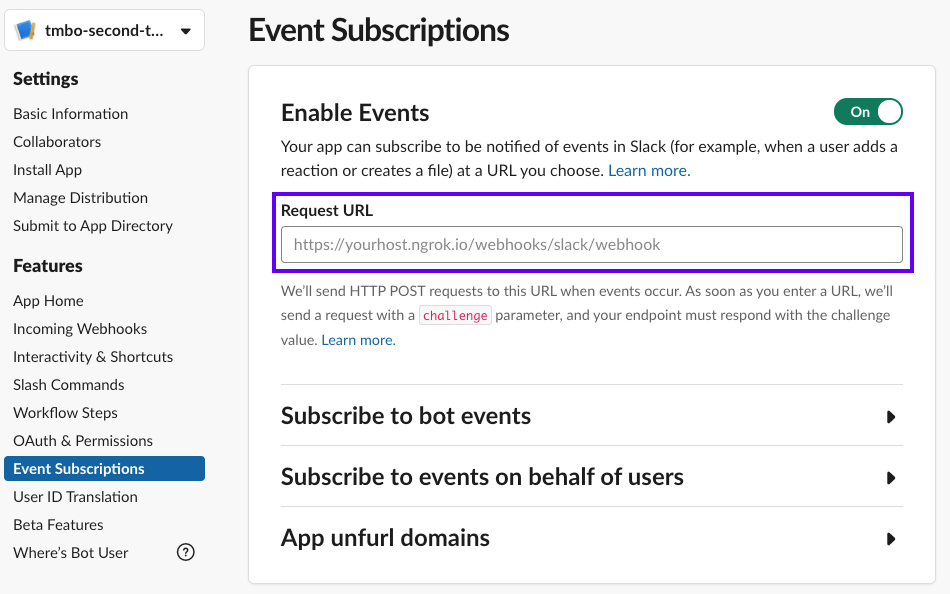
请求 URL -
作为最后一步,你需要在同一页面上订阅对话机器人事件。你需要添加如下事件:
message.channelsmessage.groupsmessage.immessage.mpim
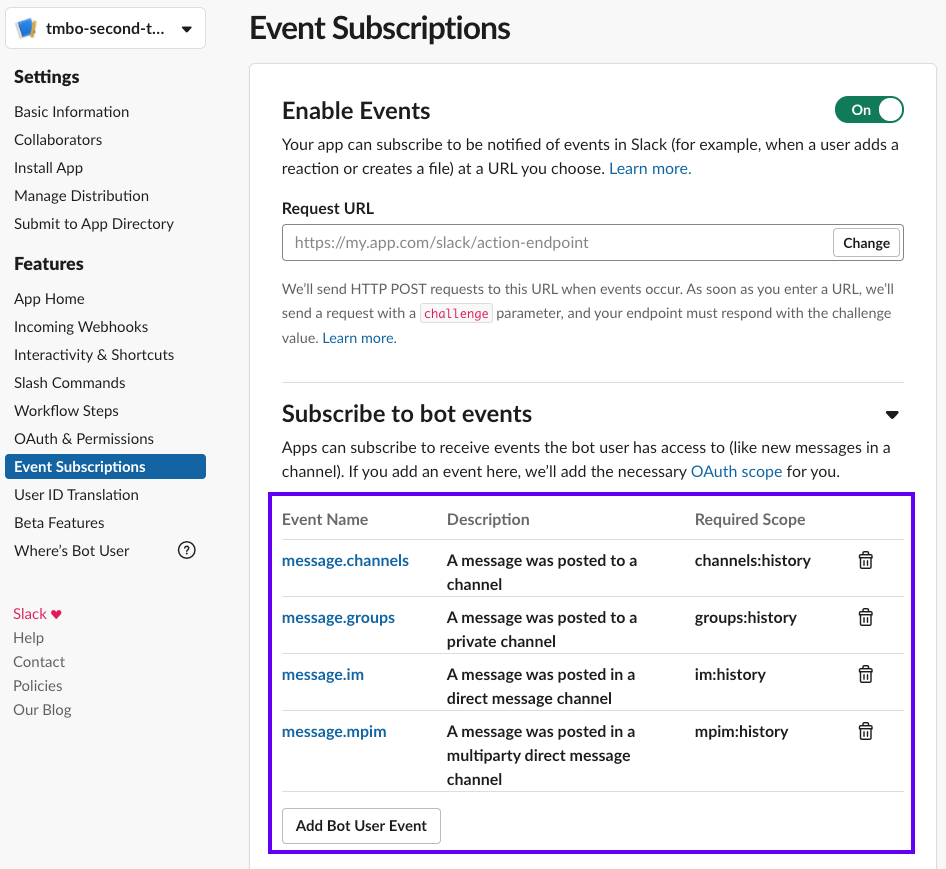
订阅对话机器人事件 添加这些事件后,请务必点击页面底部的
Save Changes。如果你在设置发送消息时没有为你的应用授予所有必须的权限,系统会提示你重新安装需要执行的应用。否则,Slack 将通过确认你的更改。
频道邀请
根据 Slack 文档,请确保邀请你的对话机器人到其应该访问的问道。你可以通过在频道中使用 /invite 来邀请。
现在你的对话机器人已准备就绪,并将接收新消息的 webhook 通知。
可选:交互式组件
完成发送消息和接收消息后,对话机器人就可以开始使用了。如果你想使用 Slack 的交互组件(按钮或菜单),你需要做一些额外的配置:
打开 Interactivity & Shortcuts 页面并将 Interactivity 切换为打开。之后,你需要在接收消息的第二步中使用的 Request URL 字段中输入相同的 URL,例如:https://<host>/webhooks/slack/webhook。

额外 Slack 选项
如下是 Slack 连接的所有配置参数的完整概述:
slack:
  slack_channel: "CA003L0XZ"    # channel ID, not a channel name!
  slack_token: "xoxb-XXX"       # token obtained in the next step
  slack_signing_secret: "YYY"   # secret obtained in the next step
  proxy: "http://myProxy.online"  # Proxy Server to route your traffic through. This configuration is optional. Only HTTP proxies are supported
  slack_retry_reason_header: "x-slack-retry-reason"  # Slack HTTP header name indicating reason that slack send retry request. This configuration is optional.
  slack_retry_number_header: "x-slack-retry-num"  # Slack HTTP header name indicating the attempt number. This configuration is optional.
  errors_ignore_retry: None  # Any error codes given by Slack included in this list will be ignored. Error codes are listed [here](https://api.slack.com/events-api#errors).
  use_threads: False  # If set to True, bot responses will appear as a threaded message in Slack. This configuration is optional and set to False by default.
  conversation_granularity: "sender" # sender allows 1 conversation per user (across channels), channel allows 1 conversation per user per channel, thread allows 1 conversation per user per thread. This configuration is optional and set to sender by default.
请确保在更改 credentials.yml 后重新启动你的 Rasa 服务器以使更改生效。